Deploy with Supabase
Self-host Trigger.dev with Supabase and Docker
Requirements
- docker
- time
Set up your project
- Create a project dir and grab the latest
.env
template
- Generate secrets with
openssl rand -hex 16
for the following variables:
- Set
NODE_ENV
to production:
Create a Supabase DB
-
No account yet? Click here to complete onboarding
- Make a note of your password, we’ll need it in a moment
- Wait until your project has finished setting up
- Navigate to
Project Settings -> Database
and copy your database connection string
- Paste it into your
.env
file, and append?schema=triggerdotdev
<PASSWORD>
with the project password you set in Step 3.- The complete file should look something like this now:
Self-host Trigger.dev with docker compose
- Create a docker compose file in your project dir
- Start your docker container
-
Wait for the database setup to finish - this might take a while
-
You should now be able to visit http://localhost:3030 and see this screen:
-
Click “Continue with Email”, enter your email address and hit submit
-
Grab the magic link from your terminal and proceed with account creation
- If everything went well, the
triggerdotdev
andgraphile_worker
schemas should now be populated. Check your Supabase DB dashboard to be sure:
- Congratulations, you’re all set up and ready to go with Supabase and Docker! 🚀
Bonus: Connection pooling
What is connection pooling?
Connection Pool - © 2023 Supabase, Apache License 2.0
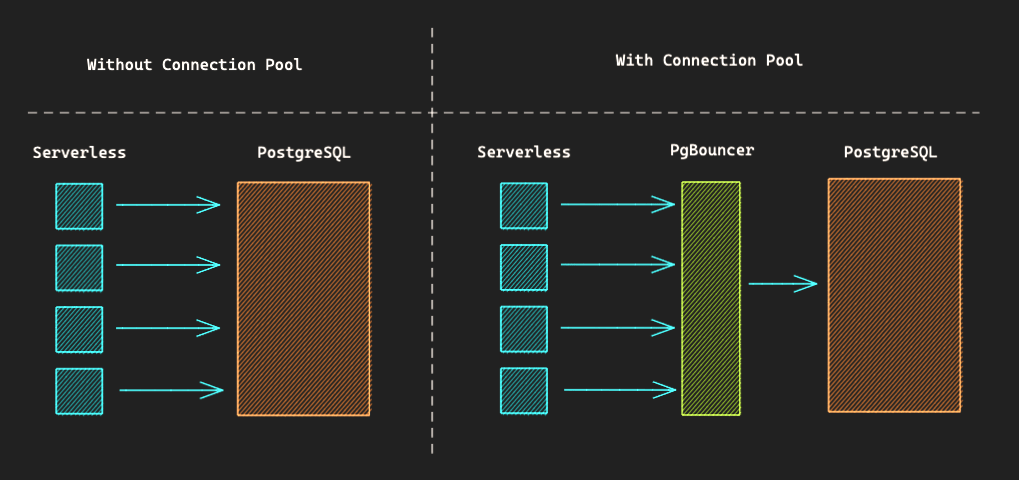
When running on a single server, our app can be trusted to manage its own connections - it knows how many are open and can process its internal queue as needed.
changes things. Here, many concurrent app instances are started, each unaware of the others’ connections. This can lead to a huge - potentially fatal - increase in connections straight to your DB.
PostgreSQL has a default connection limit of 100.
External connection pools solve this by putting an additional layer between client and server, which essentially works like a message queue that gets processed as limits allow. The clients are blind to this and can keep sending their requests as before.
Enable connection pooling
- Copy and paste the connection string from earlier to
DIRECT_URL
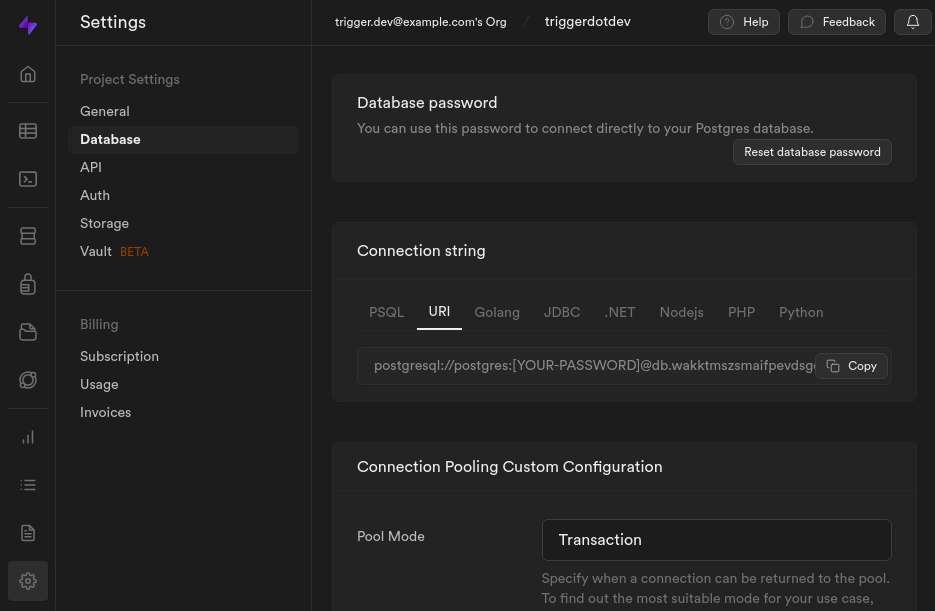
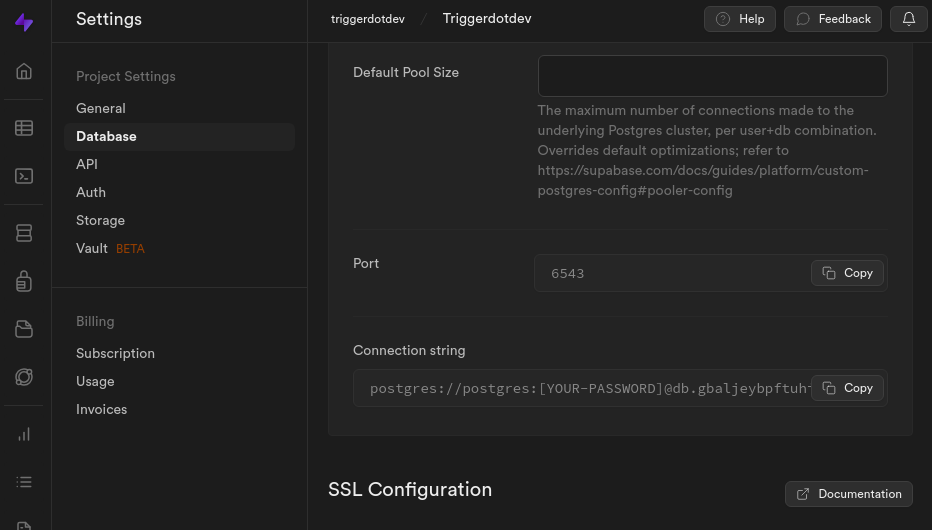
- Navigate to
Project Settings -> Database
and copy your connection pool URL
-
Paste it into your
.env
file next toDATABASE_URL
-
Append
?schema=triggerdotdev&pgbouncer=true
and insert your password
- All done! You can now enjoy the benefits of connection pooling ⚡️
Next steps
Was this page helpful?